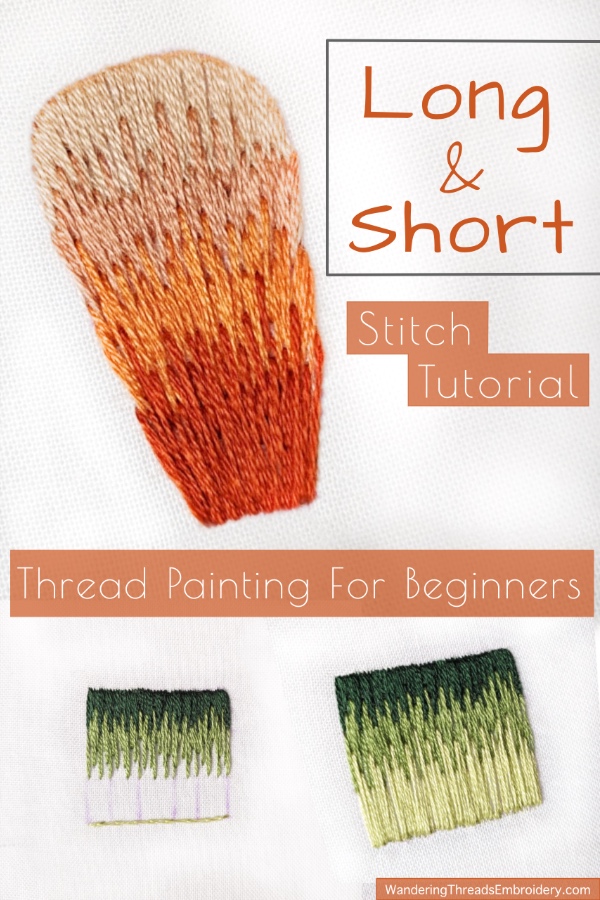
Long and Short embroidery stitch, also called needle painting or thread painting, is a fill type of stitch that produces stunning results. The most often-seen version of this stitch uses several similar shades of thread to create an ombre effect.
What is Long & Short Stitch?
In simple terms, long & short stitch is a series of interlocking straight stitches that fill a shape. By blending different thread colors and using only one or two strands of floss, the result is reminiscent of a painting.
While similar to Satin Stitch, Long & Short stitch is a better choice for larger shapes. Even using one single thread color, long & short stitches can create an interesting textured effect as a filler stitch in a larger shape.
For this tutorial, we will be using long & short stitches to fill in three shapes. All the examples use two strands of floss. The fewer strands of floss, the easier it is to blend the colors and stitches. One strand of floss is ideal for a truly blended look, but it will take longer to stitch.
Long & Short Stitch Tutorial: Square
1. Draw a Square
The three green shades used in this example are:
DMC 319, 3347, and 3348.
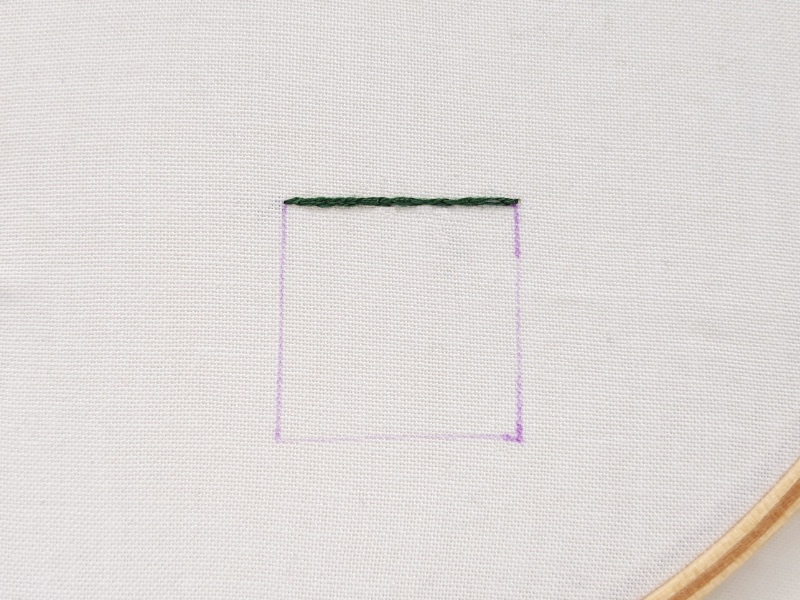
Let’s start with a simple square. The example shown is a 1″ x 1″ square. Fill the top line with split stitch using the same color you will start filling with. In this case, we are starting with #319, the darkest color.
2. Draw guidelines
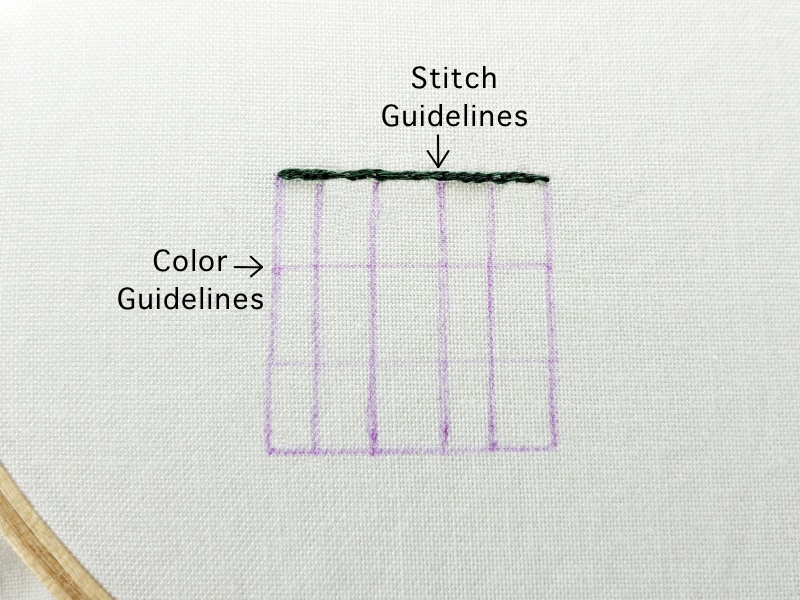
Draw vertical guidelines to keep the stitches straight and horizontal guidelines to mark the thread color changes. These lines are optional, but I find them helpful, especially when working on a larger shape with multiple colors.
3. Stitch Guidelines:
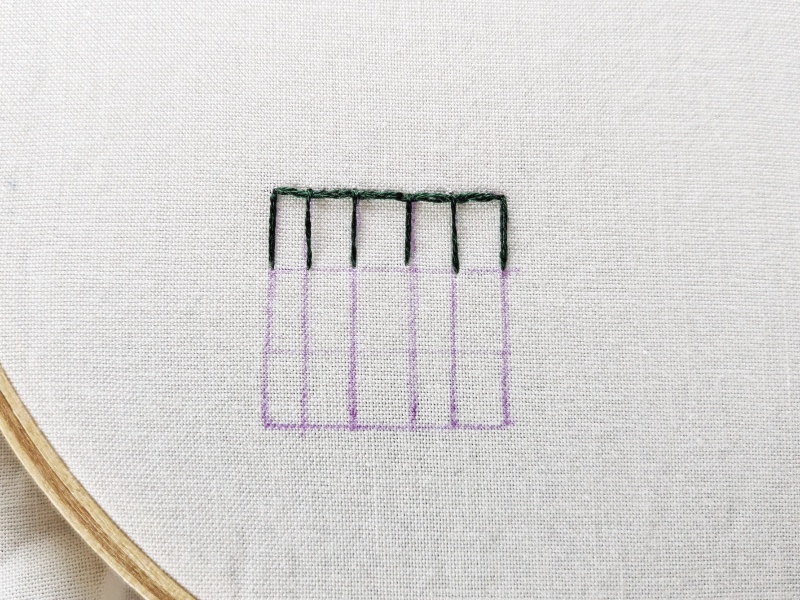
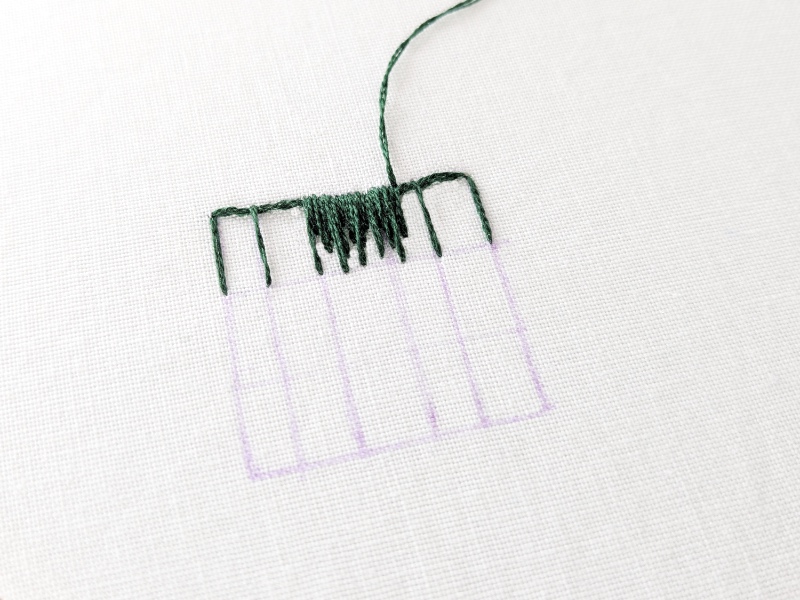
Following the vertical lines, stitch over the drawn guidelines starting from the top of the split stitch line to the first color-changing guideline. These lines should be roughly the same length. Be sure to start the stitch above the line of split stitch.
4. Fill in with Long & Short Stitches
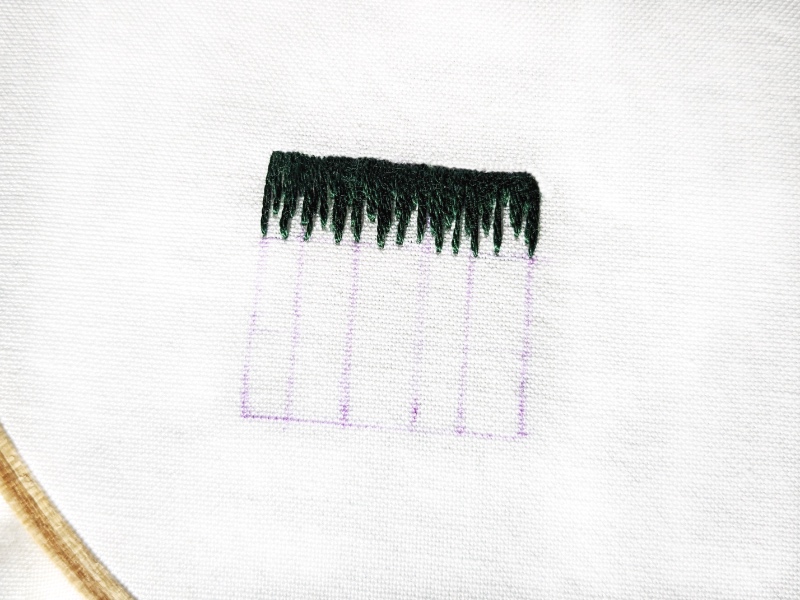
Starting in the middle of the square*, stitch toward one side by filling in the gaps between the guidelines with long and short stitches. Vary the length of the stitches, but try not to make any longer than the original guideline stitches or any shorter than half the length of the guidelines. Keep the stitches straight and close together without overlapping. The technique is similar to Satin Stitch but with varying stitch lengths.
When you reach one side of the square, weave the needle through the threads in the back and bring it back up in the middle. Stitch in the other direction until the first row is complete.
* I find it easier to keep the stitches straight when starting in the middle and stitching out toward each side.
5. Stitch Guidelines Using the Second Color
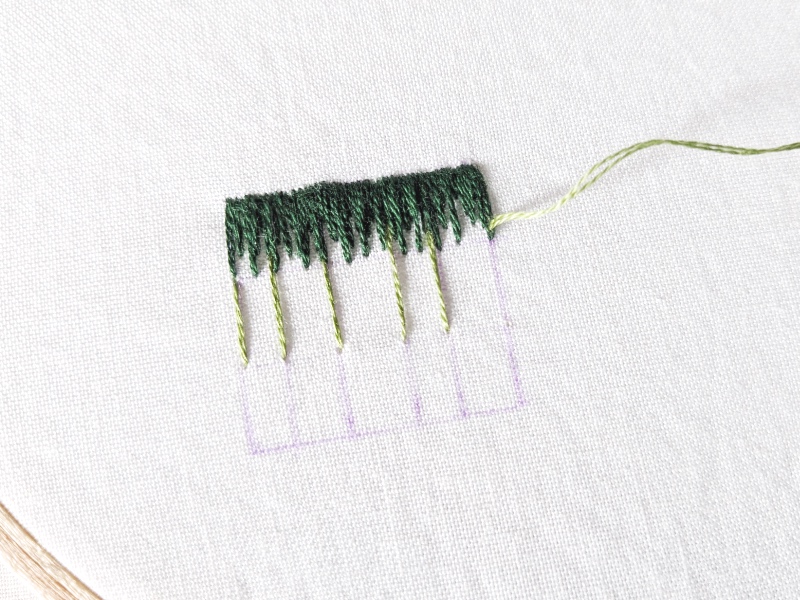
Start the second row by threading your needle with DMC 3348 and stitching long guidelines from the bottom of the first layer to the second horizontal line.
Instead of meeting the two colors by starting exactly where the first color ends (using the same hole), try splitting the first stitch with the second color. This helps avoid a stark color change and blends the two colors more effectively.
6. Fill with Long and Short Stitches
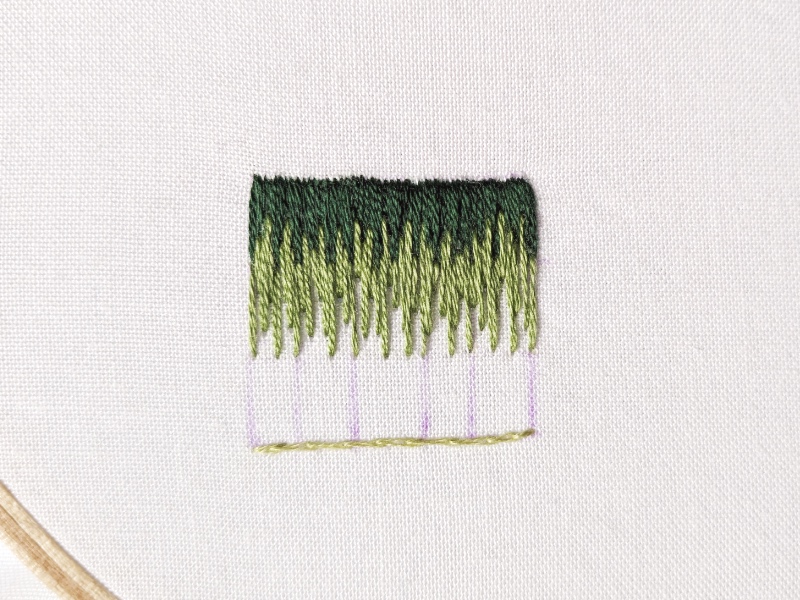
Just like you did with the first row, start in the middle and fill with long and short stitches until you reach the edge of the square. Then, return to the middle and stitch in the other direction.
The ambiguity when it comes to stitch lengths is a struggle for some and what makes this stitch challenging. Try not to overthink it and instead focus on making a variety of stitch lengths in a random pattern.
7. Fill in the Last Row
Start the last row by covering the bottom of the square with a line of split stitch using DMC 3347. Make long guideline stitches and fill with long & short stitches. This time, all the stitches will end at the bottom, outside the line of split stitch.
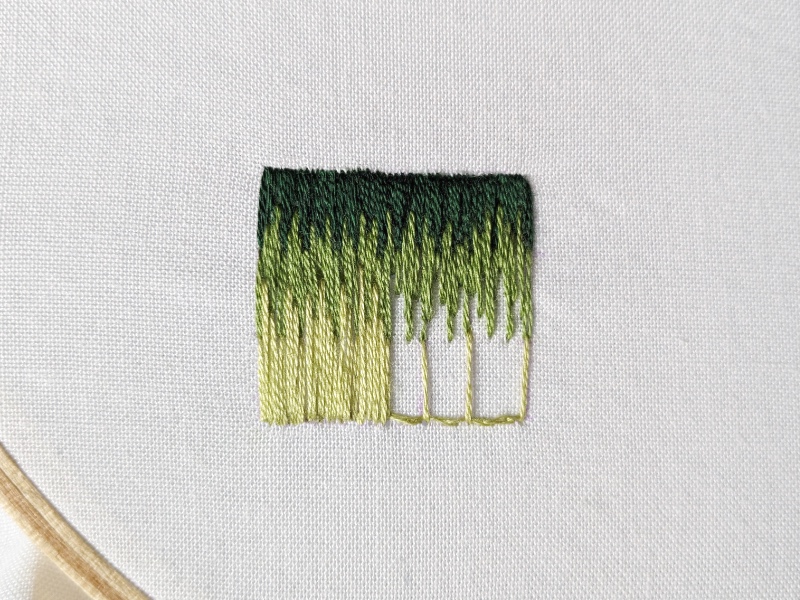
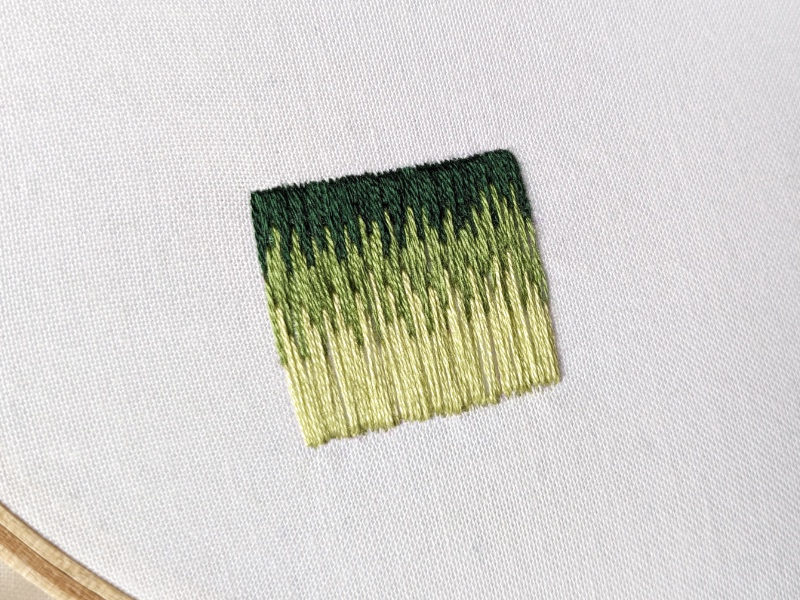
As you can see, my square is far from perfect. There are a few instances where the thread doesn’t lay flat, and it might look better with an additional thread color at the bottom. My long & short stitch is always a work in progress!
Long & Short Tutorial – Petal Shape
The basic technique for Long & Short stitch is the same for filling all shapes. However, when it comes to shapes with angled edges, the stitches are placed at an angle to match the shape. This is where the guidelines are helpful as getting off track is easy.
1. Draw the Shape with Guidelines & Outline with Split Stitch
The four thread colors used in this example are:
DMC 920, 922, 3064, and 3864
For this example, draw a petal shape that is wider and rounded at the top and tapers slightly at the bottom. Draw the first vertical guideline in the center, then a few more on either side following the angle of the shape. Add three horizontal guidelines to indicate the thread color changes.
Outline the entire shape with split stitch using the lightest color thread, DMC 3864. When outlining the entire shape with split stitch, it’s always best to use the lightest color as it’s the easiest to cover up.
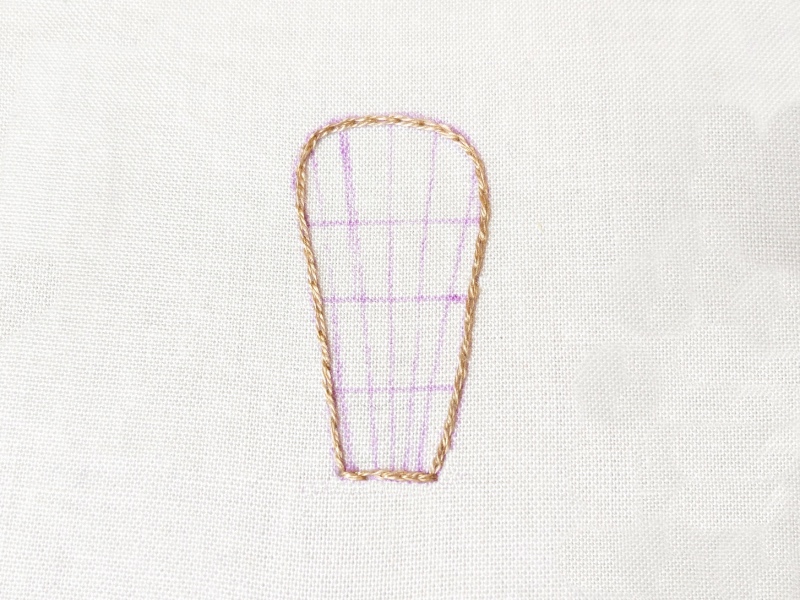
2. Add Guideline Stitches & Fill w/ Long & Short Stitches
Add the guideline stitches to the top row using DMC 3684 starting above the line of split stitch and ending at the first horizontal line. Be sure to angle the stitches near the edge to match the angle of the shape.
Start in the middle and fill with long and short stitches until you reach one edge. Return to the middle and stitch in the other direction.
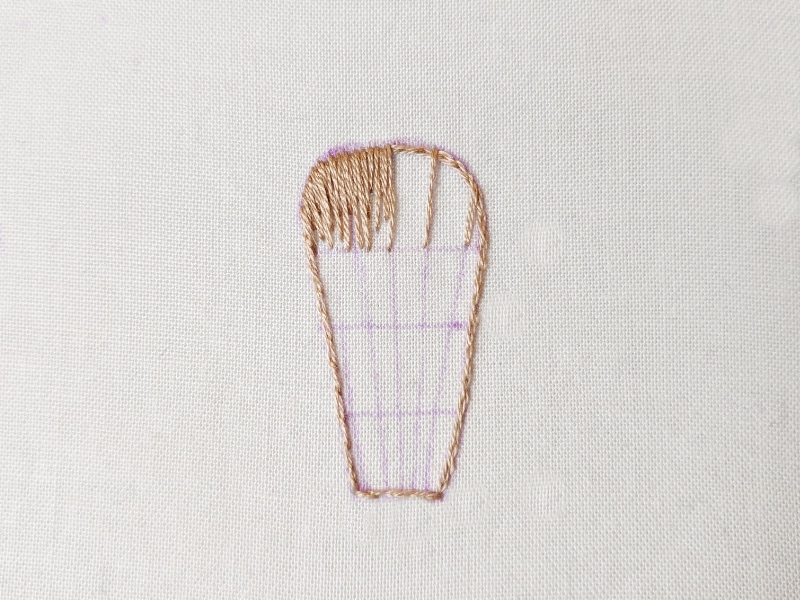
3. Fill in the Second Row With the Next Color
Following the same steps as above, add long guideline stitches using DMC 3064. Then, fill in with long and short stitches. Note that fewer stitches will be needed to fill each section as the shape tapers toward the bottom.
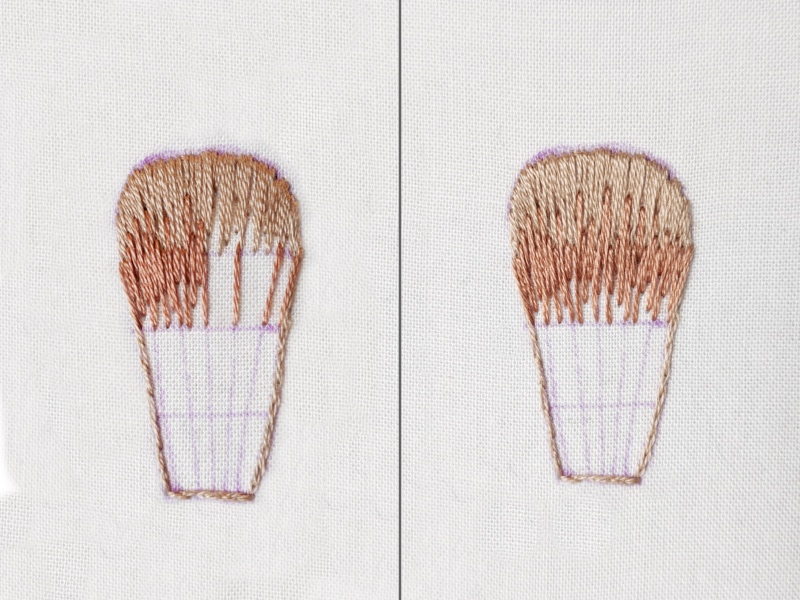
4. Fill in the Final Two Rows
Following the steps above, fill in the next two rows with DMC 922 and 920. Stitch the last row over the split stitch at the bottom. Remember that as the shape gets smaller, you will need fewer stitches. Be sure to avoid overlapping them to achieve a smooth look.
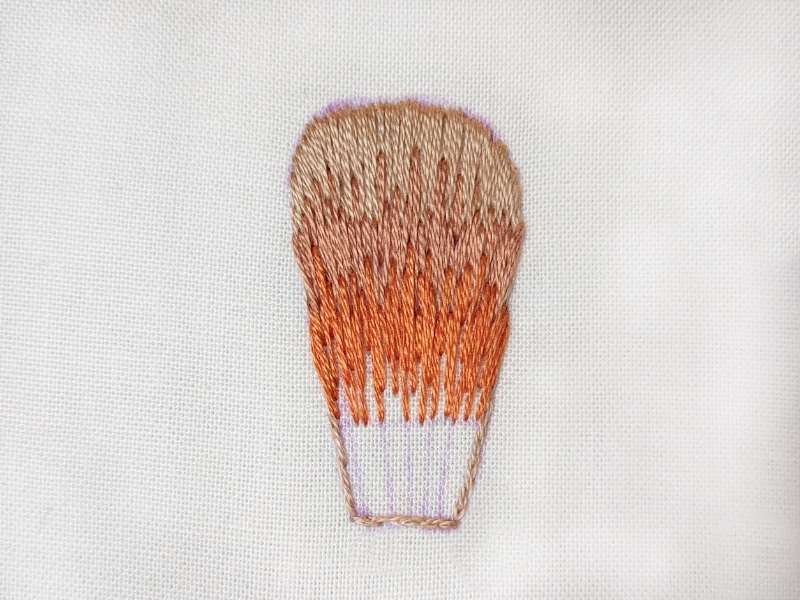
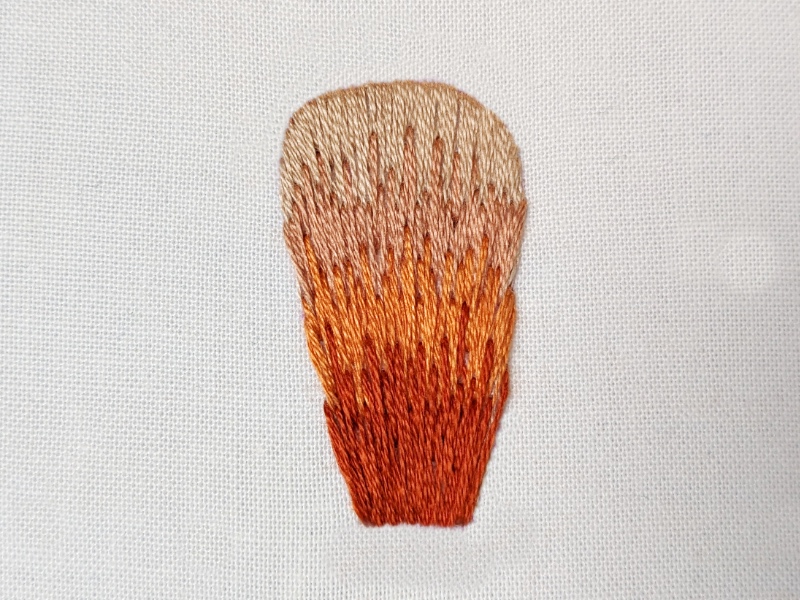
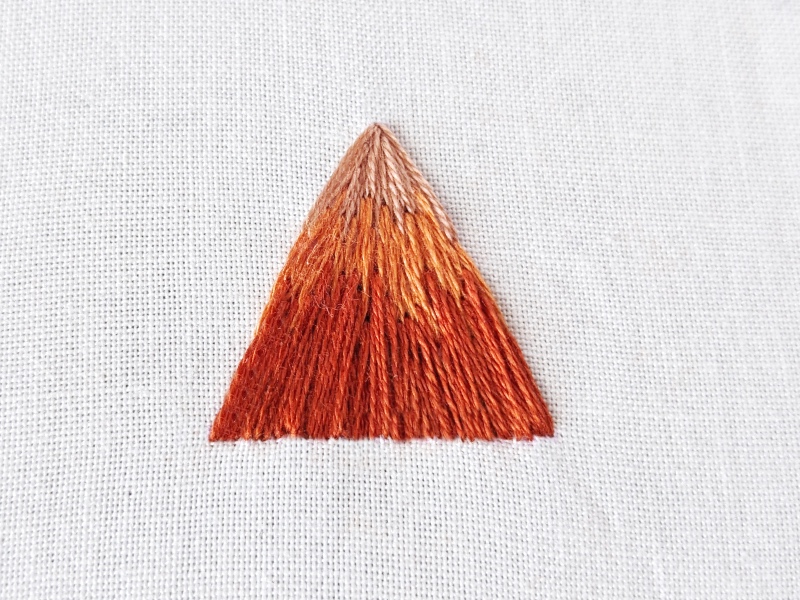
Long & Short Stitch – Triangle
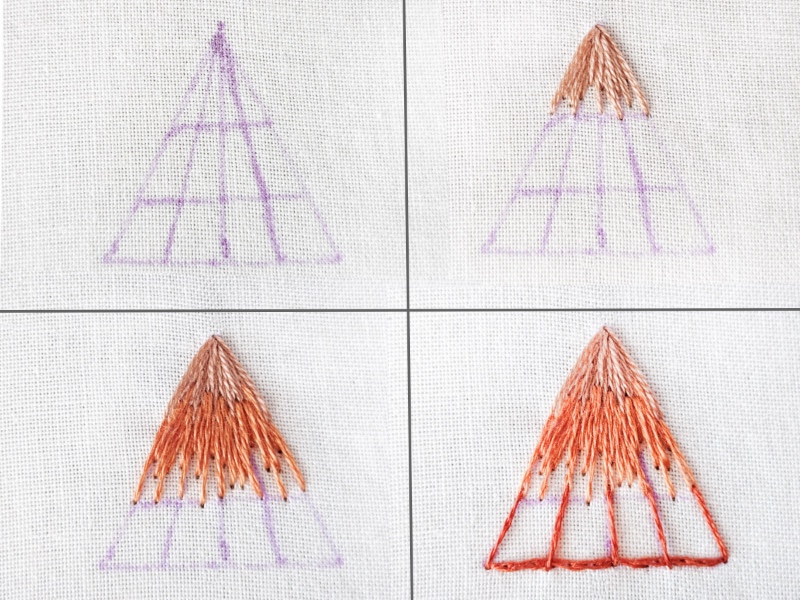
The steps for filling in a triangle shape with Long & Short stitch are the same as above. However, since the shape comes to a point at the top, the top row of stitches will need to be sharply angled and far fewer stitches are needed for the top row than the bottom row.
When using long & short for shapes such as this, you may find it easier to start at the wide bottom and use fewer stitches as you move up each row to the narrow top. In this example, I started at the top and moved down which meant that I needed to use more stitches in each row to fill the shape. Try it both ways and see what works best for you. The key to successful long & short stitches is to follow the technique guidelines while finding your own style.

Lynn Hunt
I’m new to embroidery and this is the best tutorials I have found and believe me I looked at an awful lot. Thank you.